More Slots & Screens
Posted on Sep 21, 2023
At the end of our last update, we left you wondering if we could resist the temptation to adjust the lower slots on the bumper cover. Well, of course we couldn’t. They actually didn’t need much fettling. This was the worst offender and a fairly easy fix.

So, we moved on to installing the screens. We found this nice stainless-steel mesh online that looked about the right size. It came in a roll so we had to convince it to be a flat sheet again. It wasn’t welded so would easily deform from being a rectangle so we covered it with masking tape the keep the mesh at right angles.


We decided to mesh the bumper slots in two halves rather than individually. Thankfully one piece of mesh was long enough. The un-meshed slot is for the light bracket. Still taped up we manipulated it into shape before removing the masking tape.


Then we clamped it where we could and used bags of lug nuts and anything else we could find to weight the mesh down so it would stay flush with the bumper while the glue set.


It worked very well.


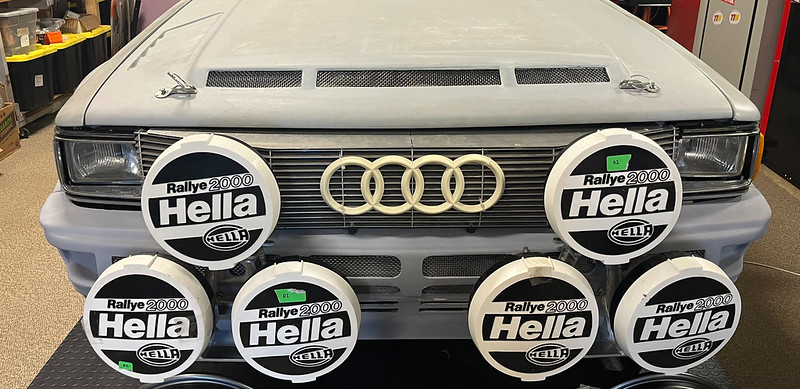
Inspired with how the mesh screens turned out in the bumper we looked at the hood slots next. They were a mess too, not surprisingly.


So we set to work with the filler and files again.

Once perfect we made individual patterns from cardboard and transferred them to taped mesh once again.

We used the same method of clamping and weighing while we glued the screen down and were very pleased with the result.


So, we moved on to installing the screens. We found this nice stainless-steel mesh online that looked about the right size. It came in a roll so we had to convince it to be a flat sheet again. It wasn’t welded so would easily deform from being a rectangle so we covered it with masking tape the keep the mesh at right angles.


We decided to mesh the bumper slots in two halves rather than individually. Thankfully one piece of mesh was long enough. The un-meshed slot is for the light bracket. Still taped up we manipulated it into shape before removing the masking tape.


Then we clamped it where we could and used bags of lug nuts and anything else we could find to weight the mesh down so it would stay flush with the bumper while the glue set.


It worked very well.


Inspired with how the mesh screens turned out in the bumper we looked at the hood slots next. They were a mess too, not surprisingly.


So we set to work with the filler and files again.

Once perfect we made individual patterns from cardboard and transferred them to taped mesh once again.

We used the same method of clamping and weighing while we glued the screen down and were very pleased with the result.


