Storage Unit Rally Build Week 11 - Diverter Valve & Door Handles
Posted on Dec 24, 2020
Diverter Valve
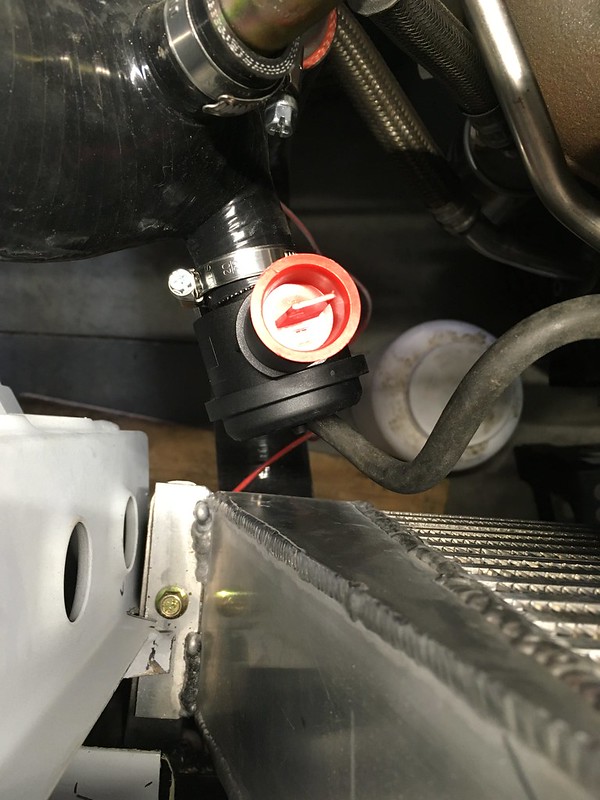
Our new diverter valve arrived while we were playing with the PCV system so we slapped that in too, upside down at first!

Fortunately, it sits directly over the turbo pipe into the intercooler

But we will need to weld on a bung to attach it. No welding in the storage unit though.

Door Handles
We were told to get a handle on things so we pulled these out of a big blue box.

They go on the doors. Might not seem like a big deal But it’s been a real PITA to constantly reach in through the window aperture to pull the interior door handle. This will make storage unit life much more palatable. If we can fit them.
We again went to the parts diagrams to see what was needed.

Initially it didn’t look promising as we seemed to be missing some actuator rods. Specifically, #8 and #9 but when we looked inside the doors we found both #8s still attached to the lock mechanisms.

Also, it turns out the missing #9 operates the lock so we’ll get one of those later as we won’t be needing to lock it for quite a while. The handles themselves cleaned up very nice and we had all the bits. The driver’s side lock did give us a scare as it appeared it may have been re-keyed at some point because we could not get it to turn. A bit of WD40 freed it up though so we slapped them on.

The actuator rods were a bit fiddly but they are now on and the doors work. Nice!

Our new diverter valve arrived while we were playing with the PCV system so we slapped that in too, upside down at first!

Fortunately, it sits directly over the turbo pipe into the intercooler

But we will need to weld on a bung to attach it. No welding in the storage unit though.

Door Handles
We were told to get a handle on things so we pulled these out of a big blue box.

They go on the doors. Might not seem like a big deal But it’s been a real PITA to constantly reach in through the window aperture to pull the interior door handle. This will make storage unit life much more palatable. If we can fit them.
We again went to the parts diagrams to see what was needed.

Initially it didn’t look promising as we seemed to be missing some actuator rods. Specifically, #8 and #9 but when we looked inside the doors we found both #8s still attached to the lock mechanisms.

Also, it turns out the missing #9 operates the lock so we’ll get one of those later as we won’t be needing to lock it for quite a while. The handles themselves cleaned up very nice and we had all the bits. The driver’s side lock did give us a scare as it appeared it may have been re-keyed at some point because we could not get it to turn. A bit of WD40 freed it up though so we slapped them on.

The actuator rods were a bit fiddly but they are now on and the doors work. Nice!

