We Install Period Correct Tablot Bullet-Shaped Mirrors on the Quattro Rally Car
Posted on Feb 27, 2020
It’s nice to conquer the big projects like intercoolers and radiators but sometimes those plans get stalled due to parts availability or even just the magnitude of them. Then it can also be nice and quite gratifying to check off a small project, even something as seemingly trivial as door mirrors.
Yes, we installed the door mirrors. But first we had to track some down and then decide where to put them. These cars in period were never quite the same as one another but they all seemed to share a common mirror, the now ridiculously expensive, for a mirror, Talbot bullet-shaped classic:
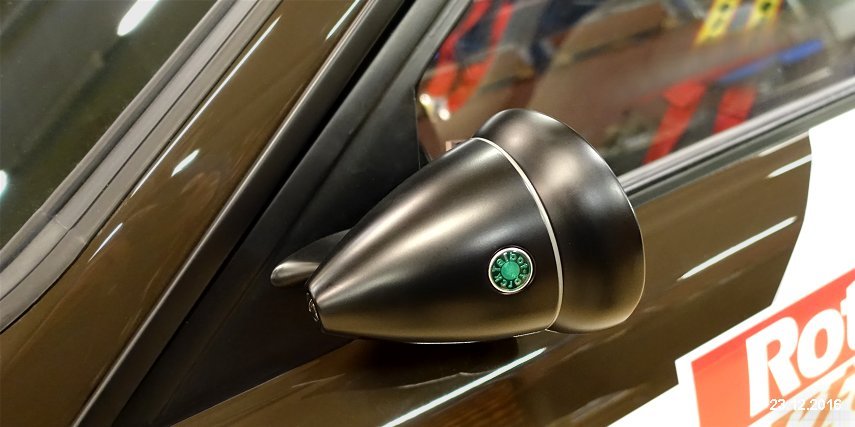
Price for new ones are over $300 each but, of course, something this easy to copy has been replicated by many and we found a set of knock offs in in England for just $65 .

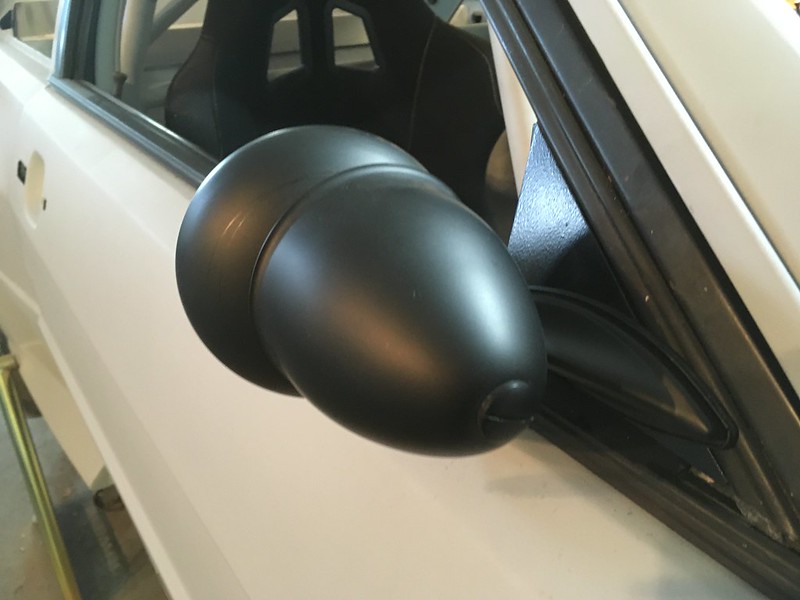
Next massive decision: where to mount them? Some cars had them mounted to the doors in period, including the Rothmans cars after which ours is modelled. Others had them on the triangular part at the bottom of the window frames where the road car mirrors were.

Both locations position the actual glass in more or less the same place so functionally there is little to be gained with one or the other. If they mount to the doors they seem to be white and if on the window surround they are black. Also, if we mount them on the window frames we still have the problem of filling the hole left by the original mirror.
At this point is should be clear where ours are going. Yes, on the window frames. They are already satin black so will not need to be refinished and they will automatically fill that little triangular hole. Well, the mirrors won’t but the triangular plate we’ll have to make will.
First mockup took a lot of trial and error drilling.

Which left quite a few additional holes on the inside, which, to be fair, was always going to need a cover anyway.

We initially mocked it up in cardboard:

And then cut them out of 1/8” aluminum. A bit shorter as we realized we needed to extend the top bar in order to mount the door card.

But then we found a piece of very thin carbon fiber and decided that would be way more appropriate, especially as the surface wasn’t flat anyway.

We still made the outside pieced out of aluminum as they had to span a large void.


That gave us everything we needed.

Just had to slap it all together.


We may paint the screws and washers black one day.
Yes, we installed the door mirrors. But first we had to track some down and then decide where to put them. These cars in period were never quite the same as one another but they all seemed to share a common mirror, the now ridiculously expensive, for a mirror, Talbot bullet-shaped classic:
Price for new ones are over $300 each but, of course, something this easy to copy has been replicated by many and we found a set of knock offs in in England for just $65 .
Next massive decision: where to mount them? Some cars had them mounted to the doors in period, including the Rothmans cars after which ours is modelled. Others had them on the triangular part at the bottom of the window frames where the road car mirrors were.
Both locations position the actual glass in more or less the same place so functionally there is little to be gained with one or the other. If they mount to the doors they seem to be white and if on the window surround they are black. Also, if we mount them on the window frames we still have the problem of filling the hole left by the original mirror.
At this point is should be clear where ours are going. Yes, on the window frames. They are already satin black so will not need to be refinished and they will automatically fill that little triangular hole. Well, the mirrors won’t but the triangular plate we’ll have to make will.
First mockup took a lot of trial and error drilling.
Which left quite a few additional holes on the inside, which, to be fair, was always going to need a cover anyway.
We initially mocked it up in cardboard:
And then cut them out of 1/8” aluminum. A bit shorter as we realized we needed to extend the top bar in order to mount the door card.
But then we found a piece of very thin carbon fiber and decided that would be way more appropriate, especially as the surface wasn’t flat anyway.
We still made the outside pieced out of aluminum as they had to span a large void.
That gave us everything we needed.
Just had to slap it all together.
We may paint the screws and washers black one day.